Workspace Settings & Configuration
Configure workspace branding, URL slugs, default timezones, workspace folders, and ownership lifecycle.
Accessing Workspace Settings
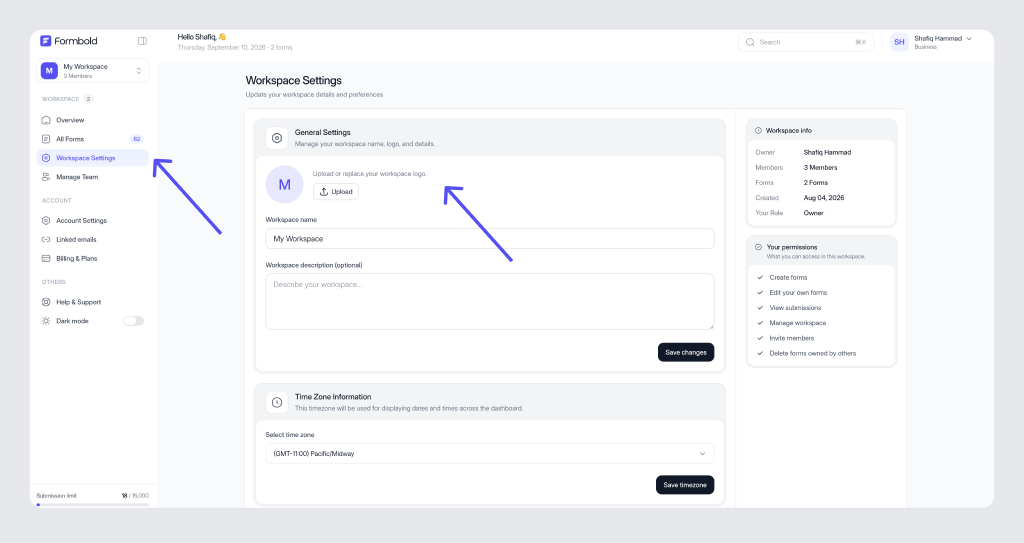
To manage your active workspace, click on your workspace avatar in the top navigation or go directly to /account/workspace-settings in your dashboard.
Workspace Branding & Identity
- Workspace Name: The display title of your team or client project. Visible to all invited collaborators.
- Workspace URL Slug: A unique URL-friendly identifier used in team invitation links.
- Workspace Avatar: Upload a company logo or project icon (PNG, JPG, SVG) to easily differentiate workspaces in the switcher menu.
Timezone Configuration
Every workspace features an independent timezone setting. When configured, all submission timestamps in your dashboard, email notifications, and analytics graphs reflect your chosen local timezone instead of UTC.
Workspace Folders
Within a workspace, you can create custom folders (e.g. 'Marketing Campaigns', 'Website Redesign', 'Internal Tools') to organize multiple forms without cluttering the main forms dashboard.
Transferring Workspace Ownership
If you are stepping down from a project or handing over a client's workspace, you can transfer primary ownership to any verified administrator:
- Navigate to Workspace Settings > Transfer Ownership.
- Select a verified team administrator from the dropdown list.
- Confirm the transfer. The selected user will become the new Owner with full billing and workspace deletion privileges.
Leaving or Deleting a Workspace
Depending on your role, you can leave or permanently delete a workspace:
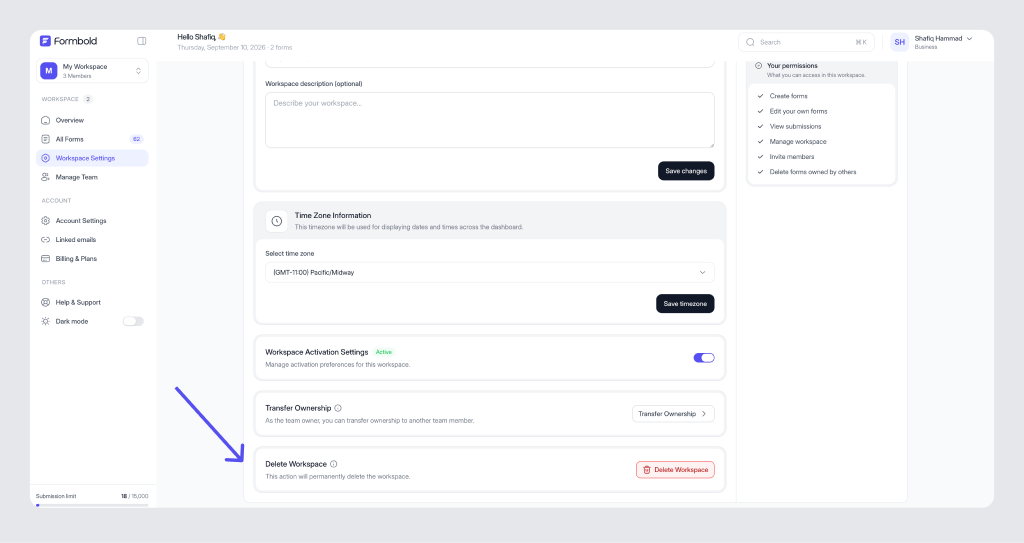
- Leave Workspace: Team members and administrators can voluntarily exit a workspace at any time.
- Delete Workspace: Only the workspace Owner can permanently delete a workspace. Deleting a workspace purges all member invites, forms, and submission records permanently.
Last updated: September 10, 2026