Webhooks Guide
FormBold Offers Webhooks, you can use it to get all the submissions as JSON. You can use them and analyze them as you want.
To be able to use the API first you’ll have to turn on the HTTP API access.
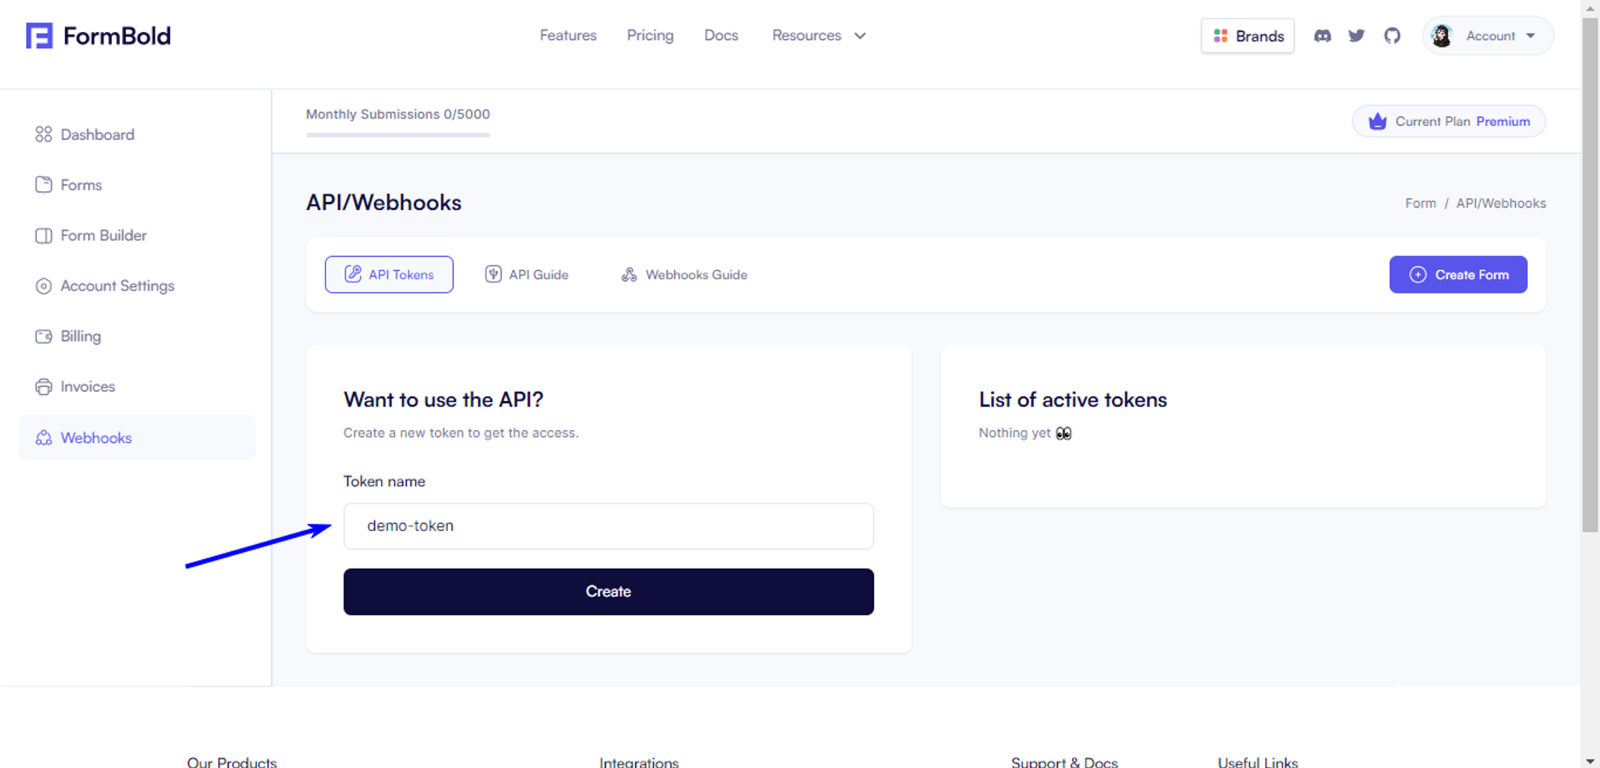
After that, you’ll have to generate the Token.
Generate Token
- Go to the Webhooks tab. You’ll see a lot of options there.

- After that generate the Token.
To generate a token add a name and click on the Create button.
When you click on the button it’ll generate a token for you. You can copy it by clicking the copy button
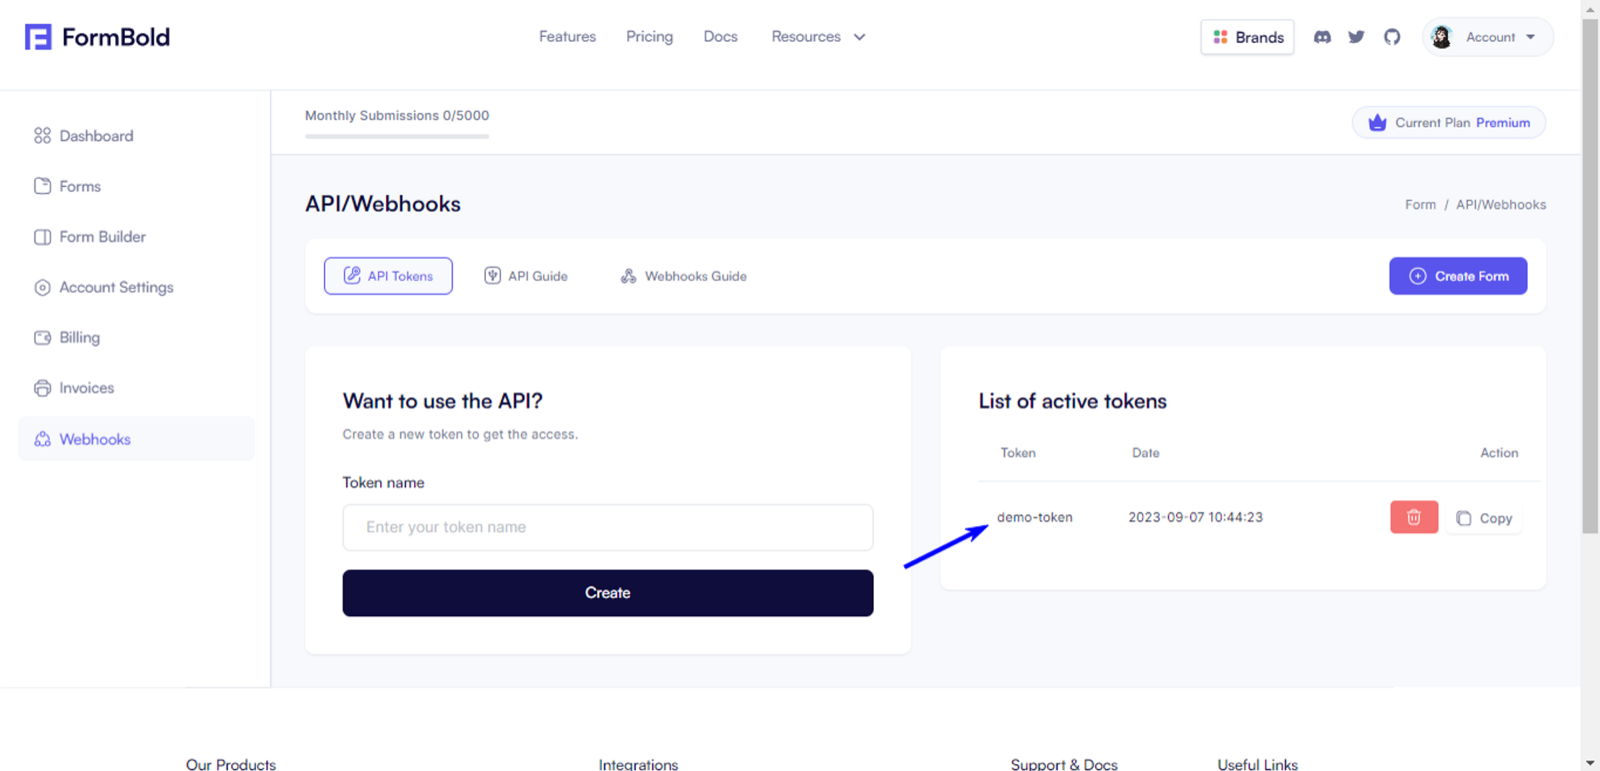
If you want to delete the token then click on the Delete icon. It’ll remove the token, you won’t be able to access the API with that token anymore.
Get All the Submissions
To send the request you need the Token and the API endpoint.
We’ve generated the token above. Now we need the endpoint.
Here’s the base URL:
https://api.formbold.comAuthorization: Before sending the request we will have to attach the Auth Token to the Request Header. It’s the token we generated earlier.
Add that as a bearer token like this to the Request Header:
Authorization: Bearer YOUR_TOKENAfter that, you’ll have to send a request to the API. Here we are going to get all the submissions.
For that, we will hit this endpoint:
GET /api/forms/formId/submissions?page=1&limit=2To fetch all the submissions at once hit this endpoint:
GET /api/forms/formId/submissions?all=trueIf the request is completed successfully you’ll receive a JSON response like this.
{
    "data": [
        {
            "created_at": "2022-06-14T04:41:39.000000Z",
            "fields": {
                "email": "elon@tesla.com",
                "message": "Test message"
            },
            "files": [],
            "is_spam": false
        },
        {
            "created_at": "2022-06-14T04:46:45.000000Z",
            "fields": {
                "email": "tim@apple.com",
                "message": "123"
            },
            "files": [],
            "is_spam": false
        },
        {
            "created_at": "2022-06-14T04:48:46.000000Z",
            "fields": {
                "email": "mark@protonmail.com",
                "message": "Example text"
            },
            "files": [],
            "is_spam": false
        }
    ],
    "meta": {
        "pagination": {
            "count": 3,
            "current_page": 1,
            "links": {},
            "per_page": 25,
            "total": 3,
            "total_pages": 1
        }
    }
}
Using FormBold Webhooks (Zapier)
Now we are going to see how to integrate Formbold Webhook with Zapier. Follow these steps to integrate Formbold Webhook with Zapier:
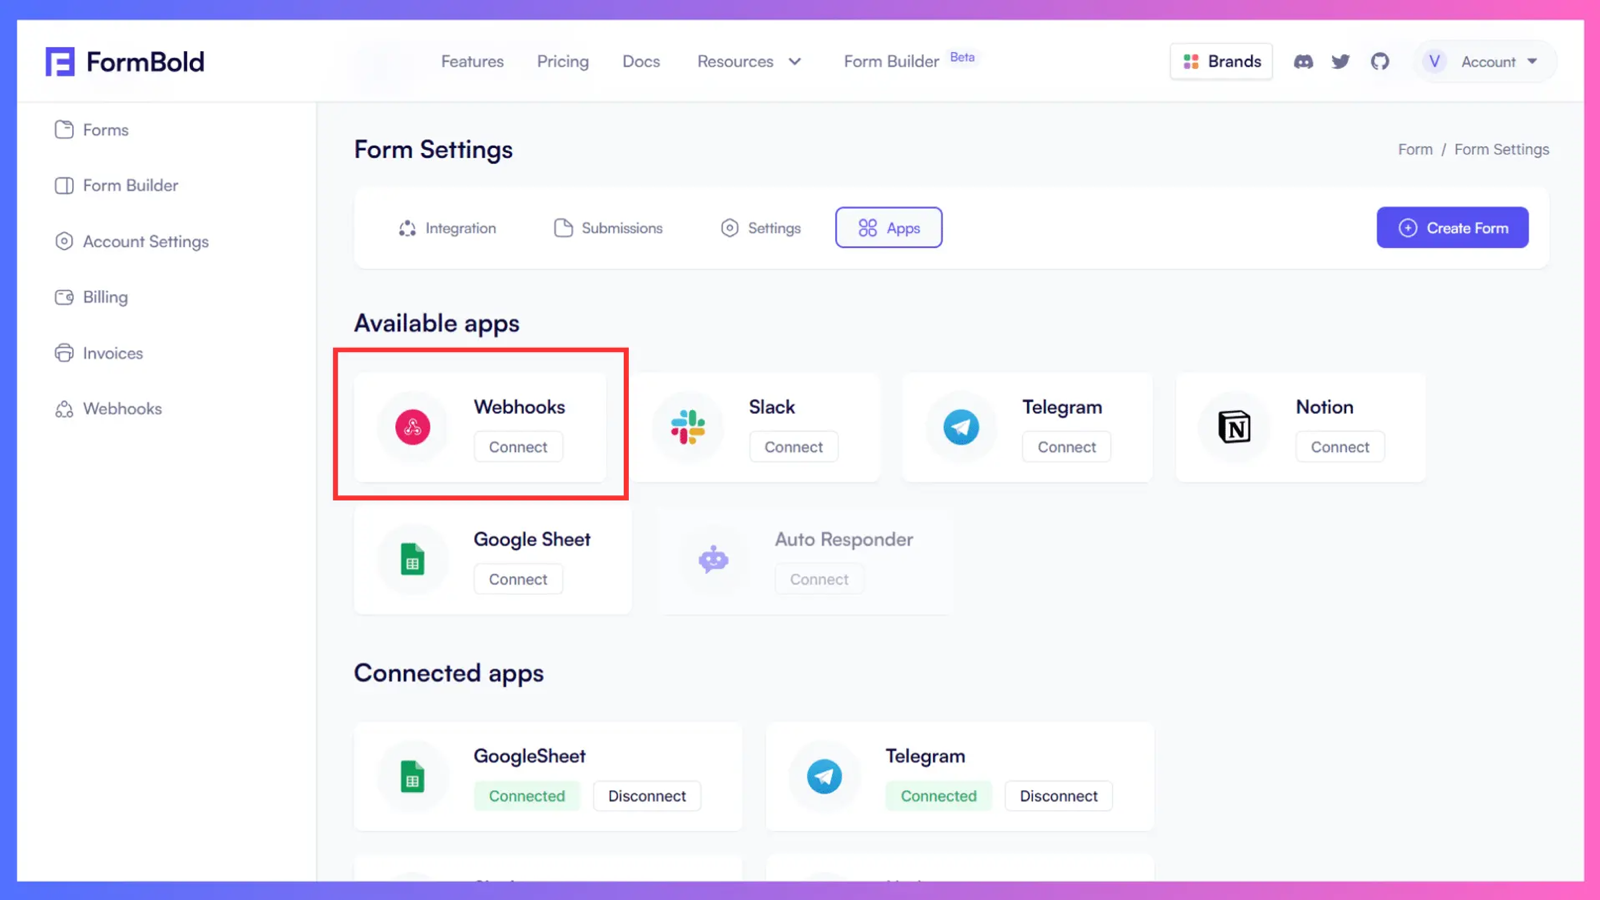
Go to Form Setting after that go to the Apps tab and click on the Webhooks button.
When you click on it you’ll see a pop-up like this.
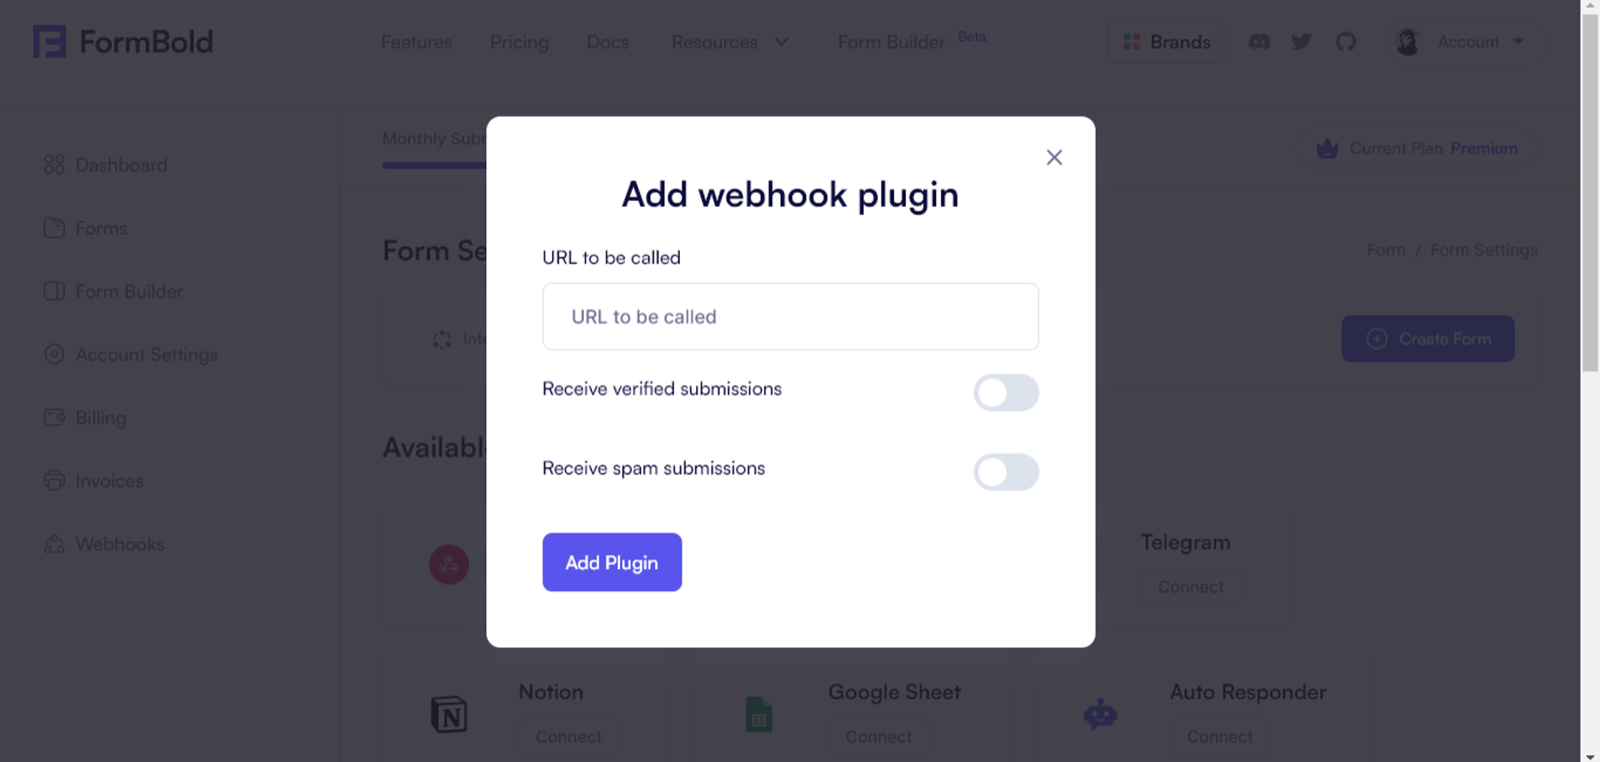
Here you have to add the Webhook response URL. To get the Webhook URL we will have to create a Zap on Zapier
Create a Zap for integration
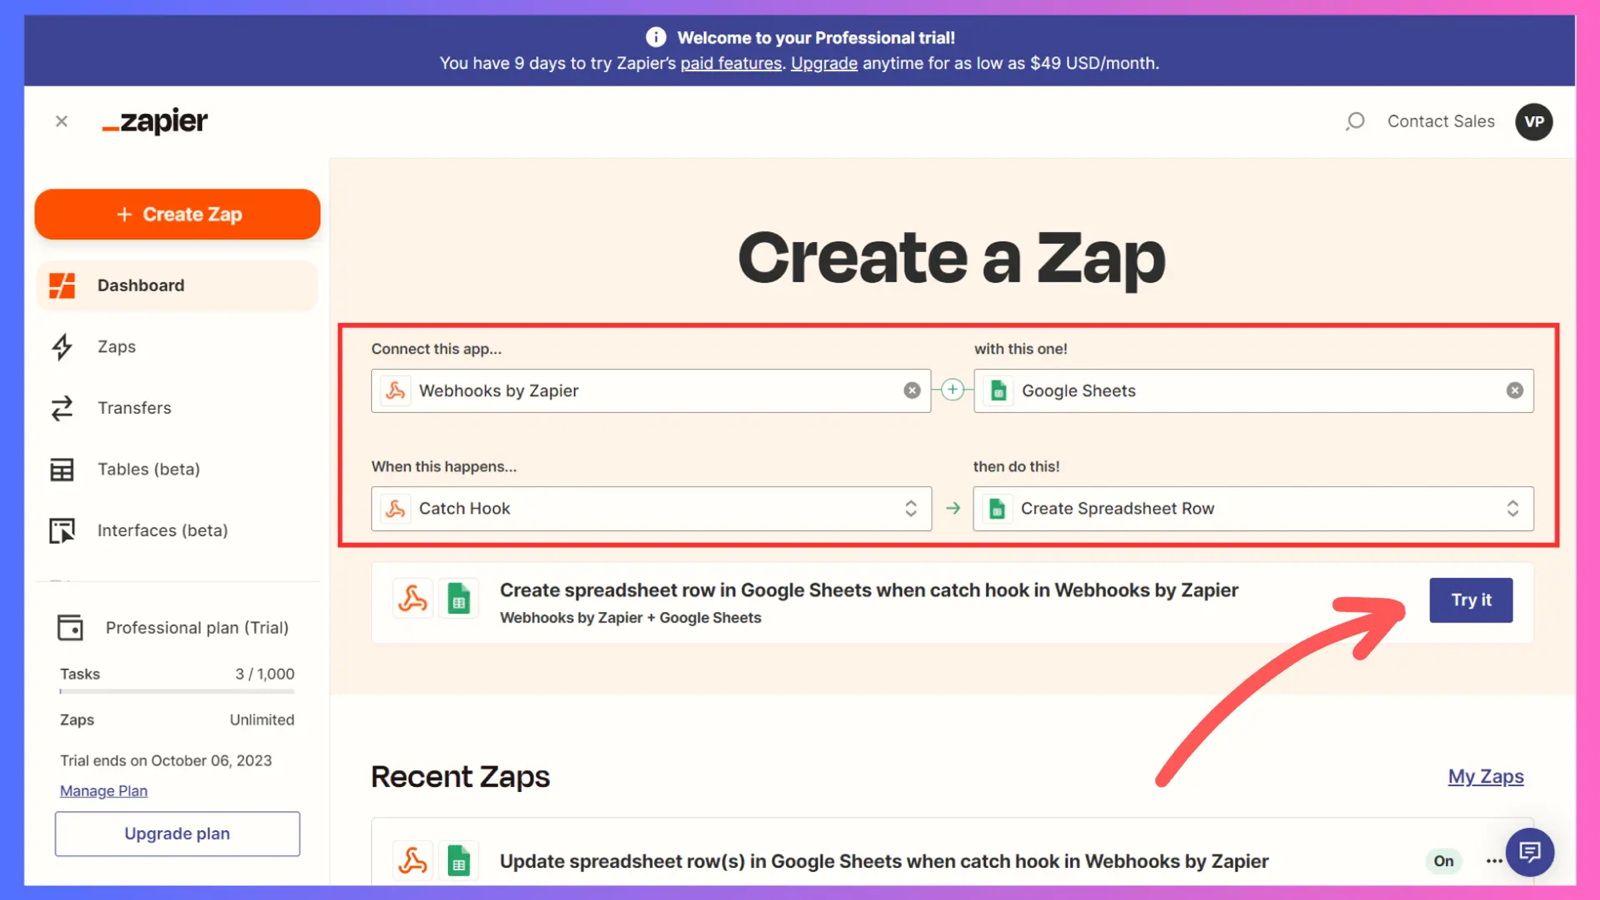
Sign in or sign up on Zapier after that click on the create zap button
Here you need to select the following option to get a response in the sheet:
Connect this app - Webhook by Zapier.
With this One! - Google Sheet
When this happens - Catch Hooks
then do this- Create a Spreadsheet Row.
After you selected all the options click on the Try it button
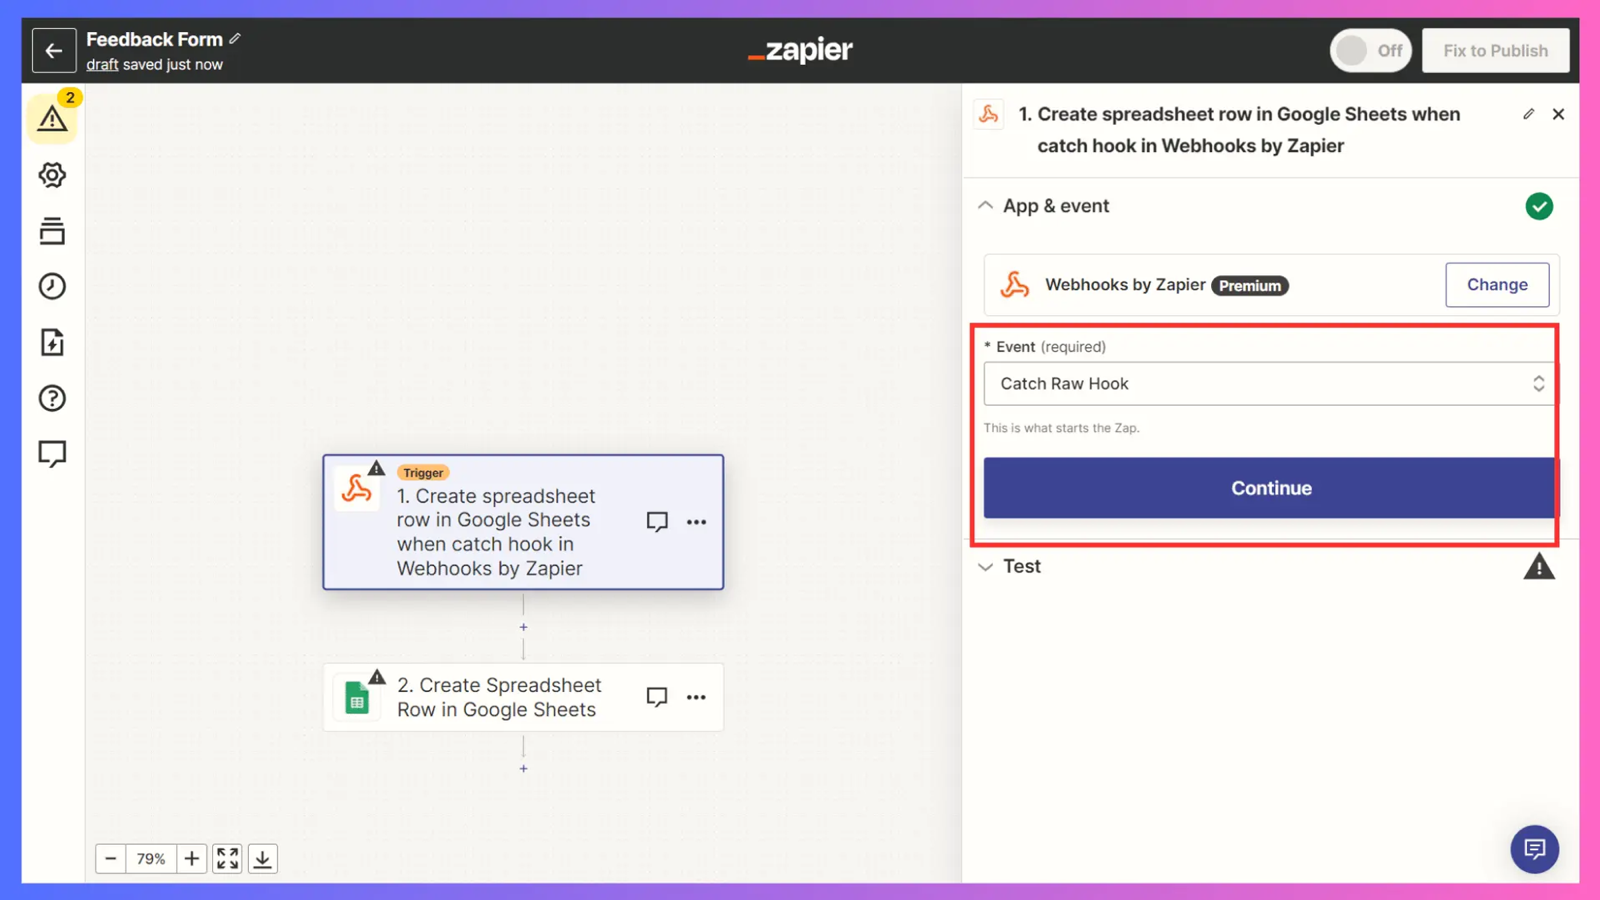
- After you create the Zap you’ll be redirected to this page. Go to App & Event. Now click on the Continue button.
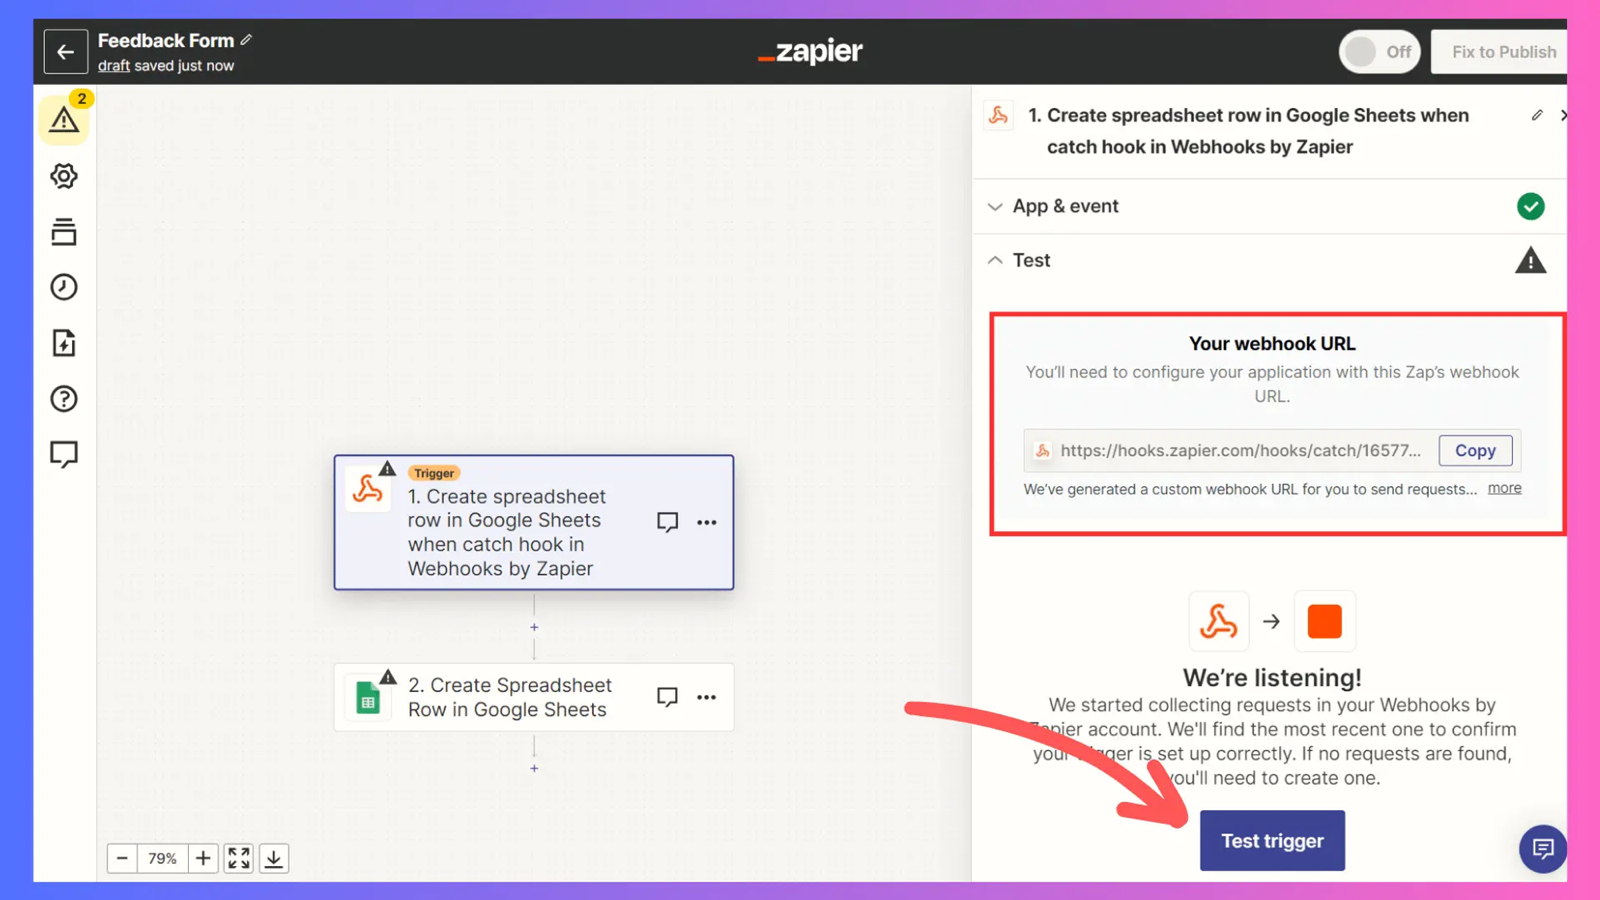
- Click on the Test tab and you’ll see the Webhook URL there. Go ahead and copy it.
-
Now click on the Test Trigger button to listen for the Webhook response. This won’t show anything right now, you’ll have to add the Webhook URL in the Formbold Webhook popup
-
Go to Formbold and paste the Webhook URL

- Now go ahead and submit a form to trigger the Webhook. After a successful submission, you’ll see the data on Zapier.
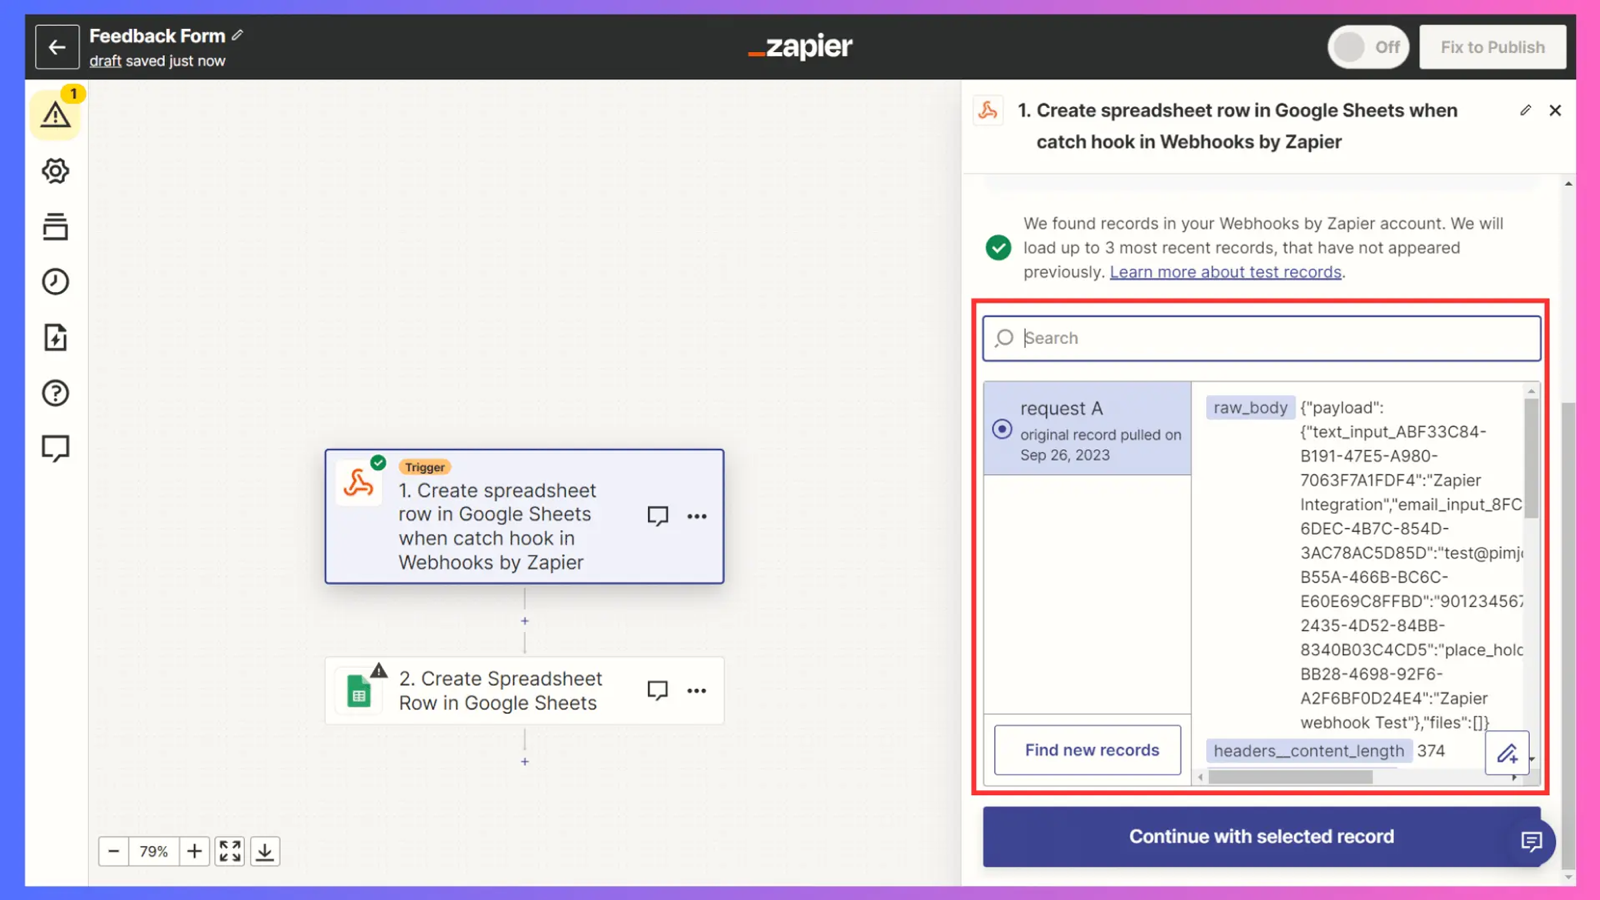
We got the data on Zapier, now we have to save the Data on Spreadsheet.
- To save the data click on the Create Spreadsheet Row in Google Sheets. It’ll open up the App & Event tab on the sidebar
-
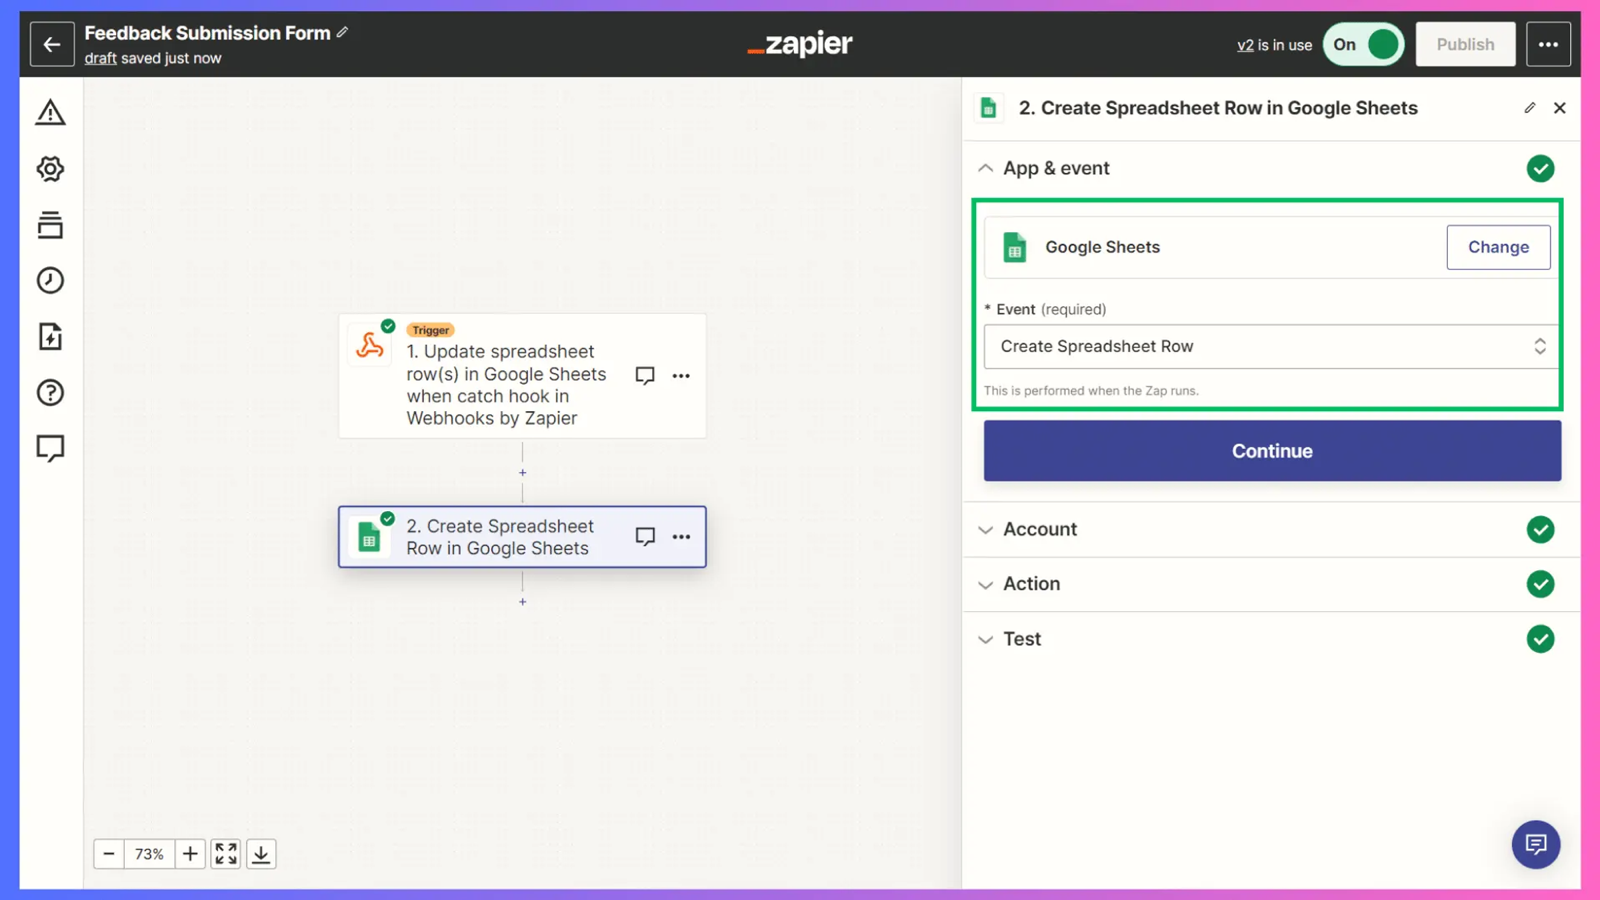
Make sure that in the App & Event, ensure that the ‘Create Spreadsheet Row’ option is selected.
-
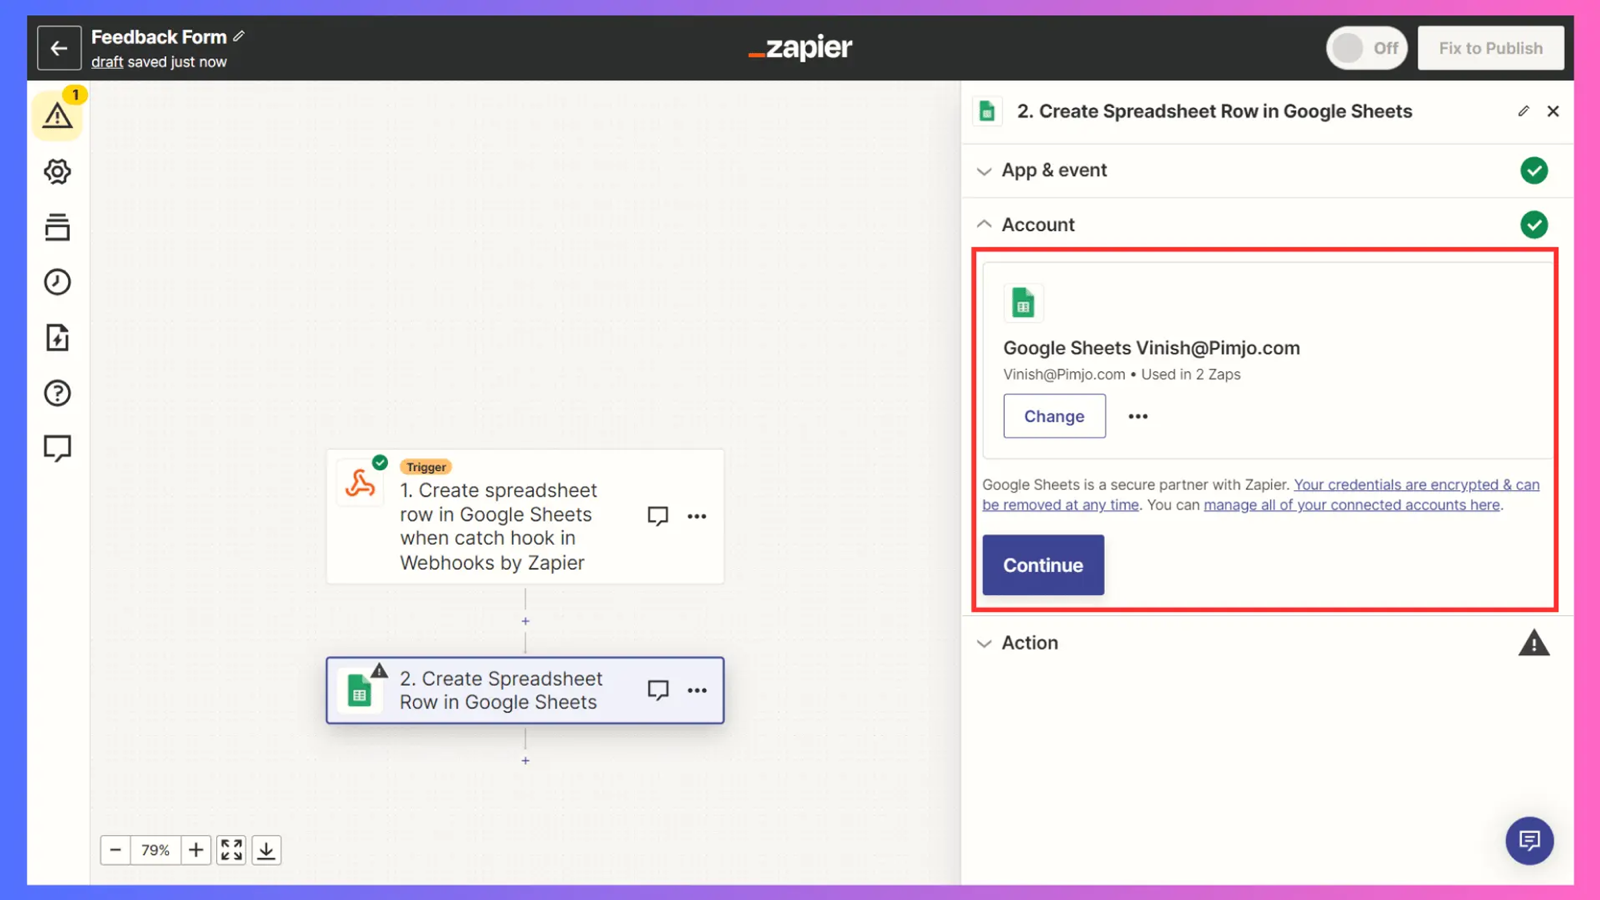
Now log in with your Google account to store the data in the Spreadsheet.
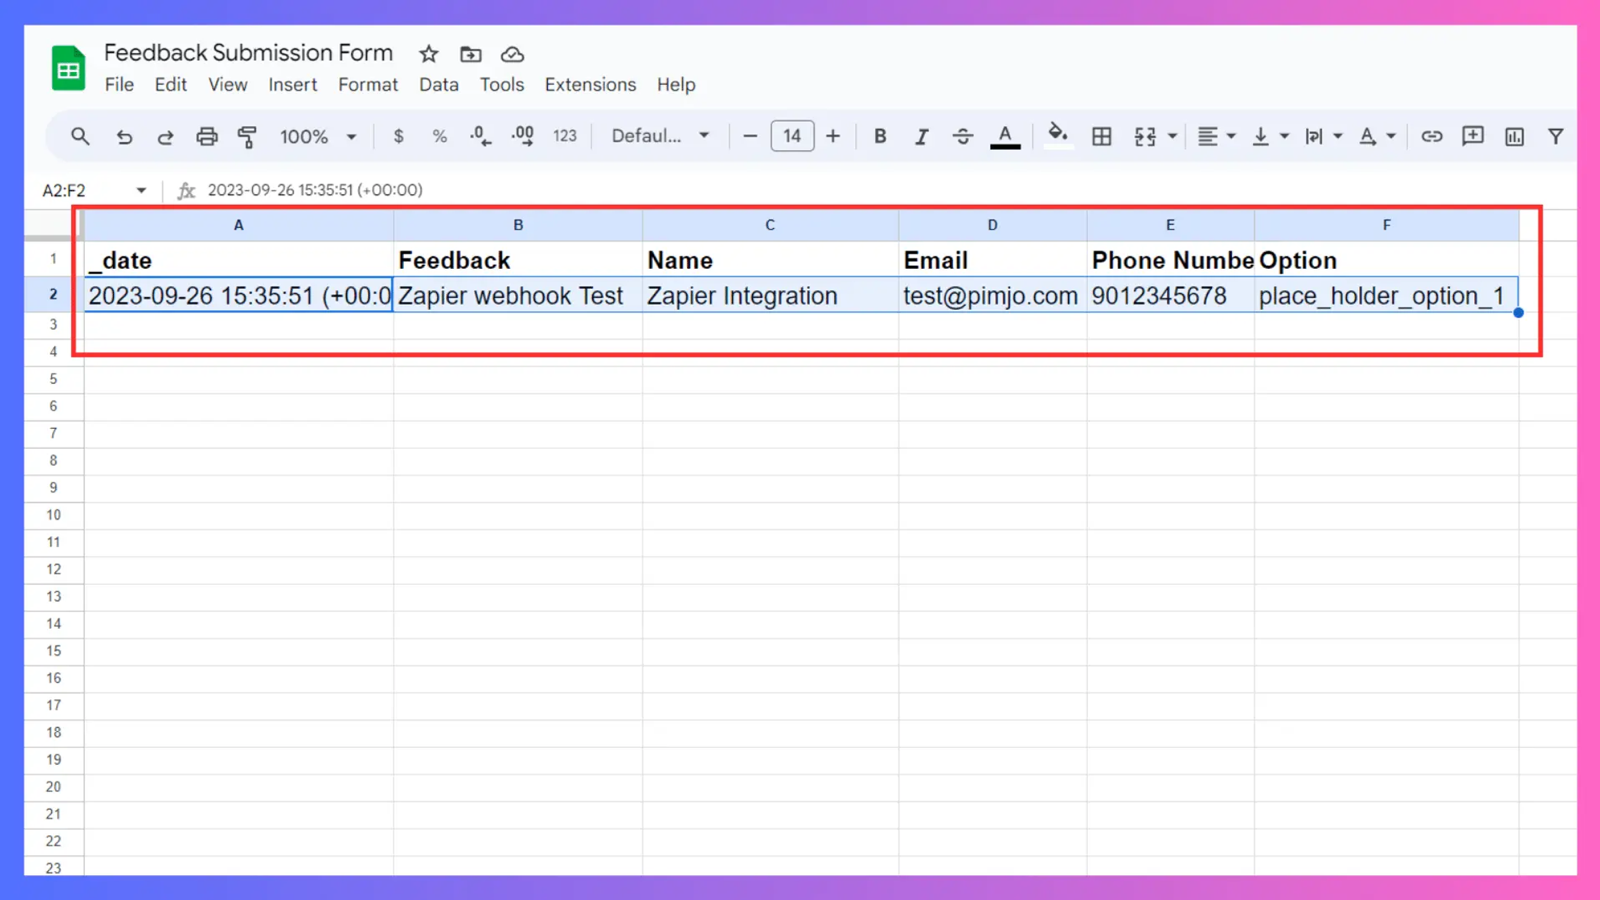
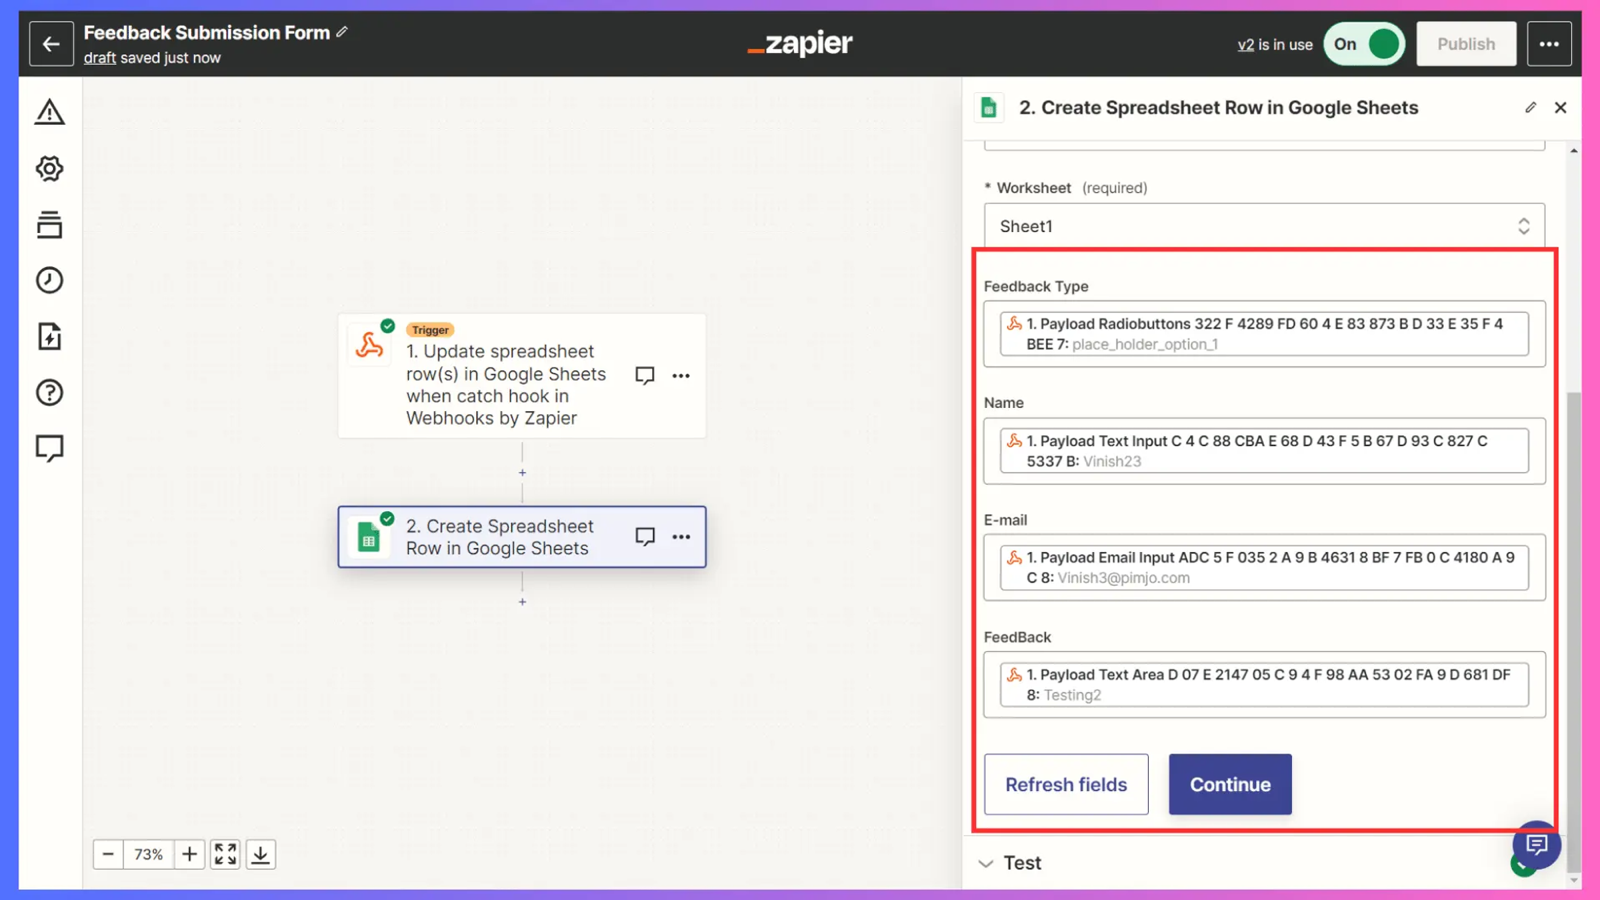
- Now, select the sheet where you want to store the form data.

- Next, map the Google Sheets columns with the Form response fields. Refresh the field button to ensure the updated columns from the Google Sheet are reflected.
-
Then, click on the ‘Continue’ button to complete this step.
-
Now, it’s time to test. Submit a dummy response in your Form and open the Google Sheet to check the response.